
Edit Module in Layout
To edit a Module:
- Go to CONTENT > CREATIVE LIBRARY.
- Click the Theme from which the Layout was created. The page will display a list of additional actions in the MANAGE section, and the Layouts to the right.
- Mouse over the Layout to edit, then click VIEW. The Edit Layout page will display with a sidebar list of all available Modules on the left, and the body workspace on the right.
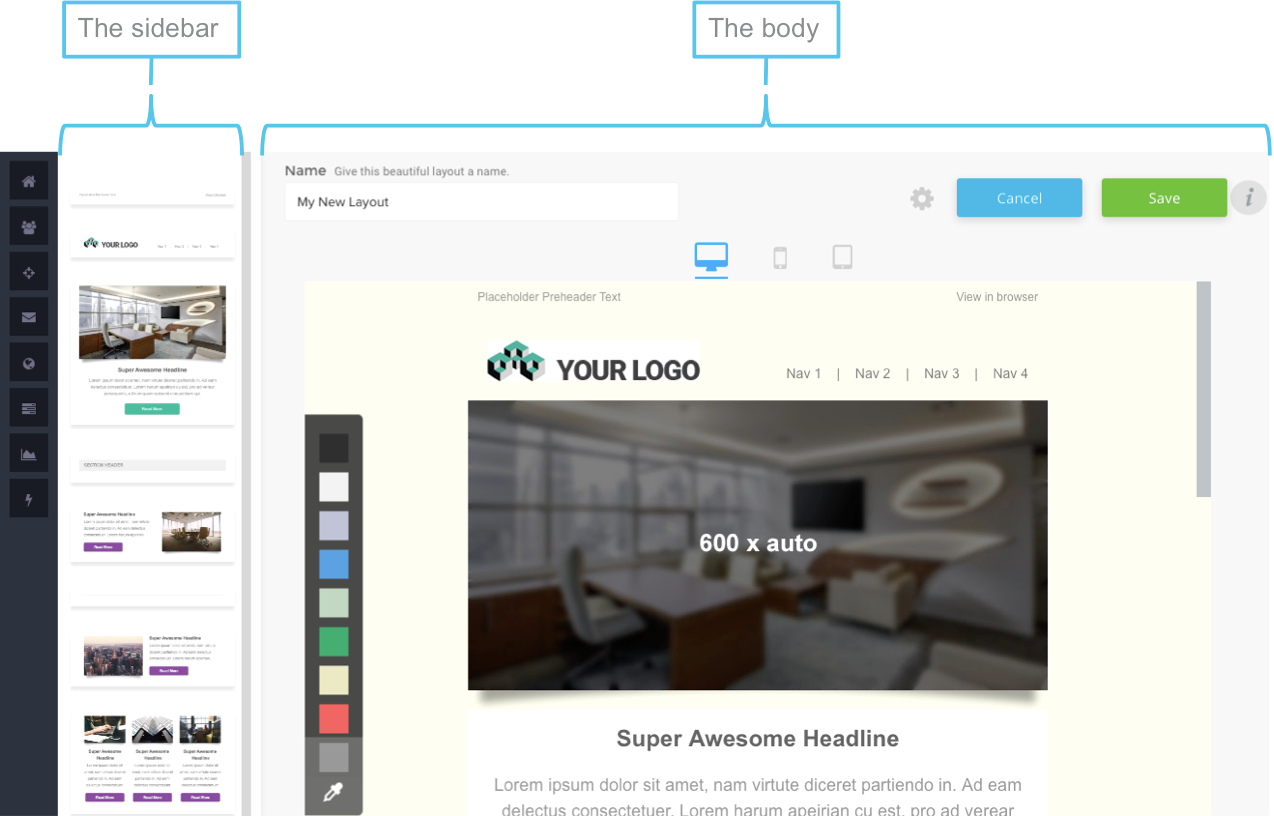
- Scroll through the Layout Workspace to the Module in the Layout you wish to edit.
- Click the Module to select it. The Edit, Copy, and Delete buttons display in the top, right of the Module space.
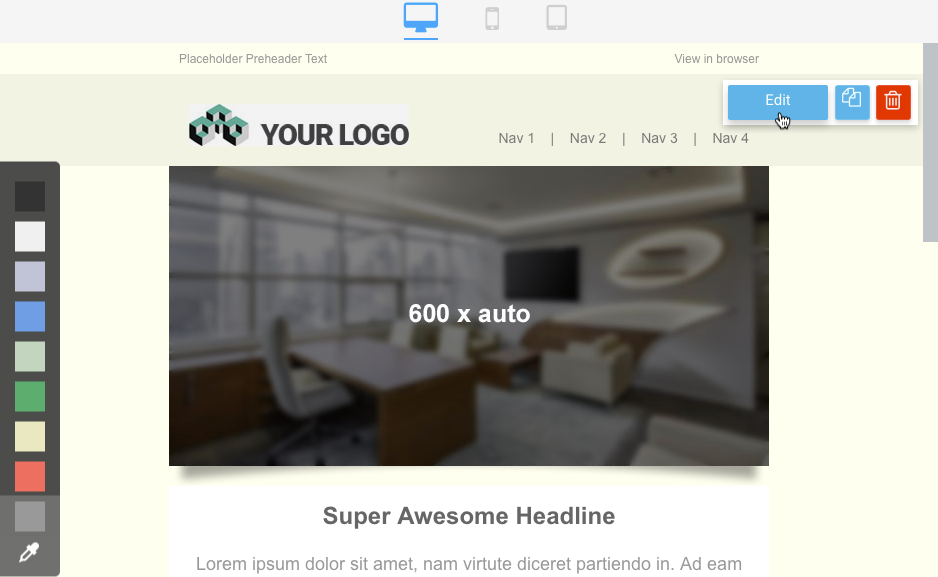
- Click Edit. The WYSIWYG editor toolbar displays at the top of the Module.

- Use the options in the toolbar to make changes within the Module. For a list of controls available in the toolbar, see WYSIWYG Toolbar Features below.
- Once you have finished editing the module, click DONE.
Hyperlinks
To create or edit a hyperlink:
- Highlight the text or click the image to link.
- Click the Link icon in the toolbar to display the Link properites.
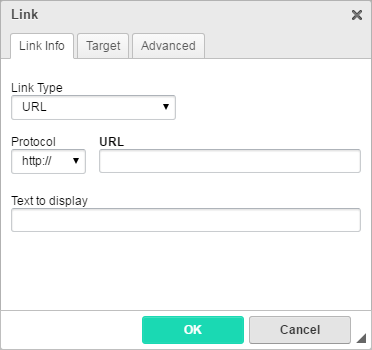
- Select the Link Type: URL, Link to anchor, Email.
- Select the Protocol.
- Enter the URL.
- If the link is text based, edit the text in the Text to display field.
- Click OK to save the changes. Click CANCEL to close the options without making a change.
To remove an existing link, highlight the text or click the image, then click the Unlink icon in the toolbar.
Images
To insert an image:
- Click in the Module body where you would like to place the image.
- Click the Image button in the toolbar to display the Image Properties.
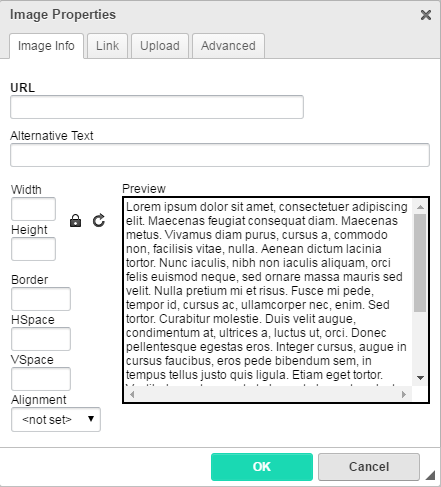
- Enter the URL to the image.
- In the IMAGE INFO tab, enter Alternative Text to display if the for the Image, adjust the size of the image, and set the alignment and border.
- Click OK to save the changes and insert the image. Click CANCEL to close the options without making a change.
To upload an image to the image server:
- Click in the Module body where you would like to place the image.
- Click the Image button in the toolbar to display the Image Properties.
- Click the UPLOAD tab.
- Click CHOOSE FILE, and select the image to upload.
- Click SEND IT TO THE SERVER. The image is stored in the Media Manager, layout_images folder (CONTENT > MEDIA MANAGER).
- The properties will display the URL in the IMAGE INFO tab.
- Click OK to save the changes and insert the image. Click CANCEL to close the options without making a change.
Template Tags
Template Tags allow you to call additional content into your Templates or Articles. To insert Template Tags from a list:
- Click in the Module body where you would like to place the Tag.
- Click the [P] (Tags) button in the toolbar to display the Custom Tag Properties.
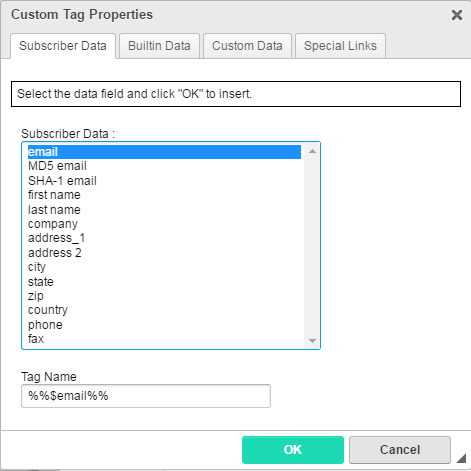
- Click the tab containing the Tag you wish to insert:
- Contact Data: All data associated with the basic Contact.
- Builtin Data: Inserts the Date/Time the message is sent.
- Custom Data: Custom Contact Data defined for your Realm.
- Special Links: Display Message, Mobile, and other links.
- Select the Tag from the list.
- Click OK to save the changes and insert the Tag. Click CANCEL to close the options without making a change.
WYSIWYG Toolbar Features
The chart below lists the CKEditor Toolbar icons and features:

*Released in v11.0.0, updated in v11.13.0