
Reports:
-
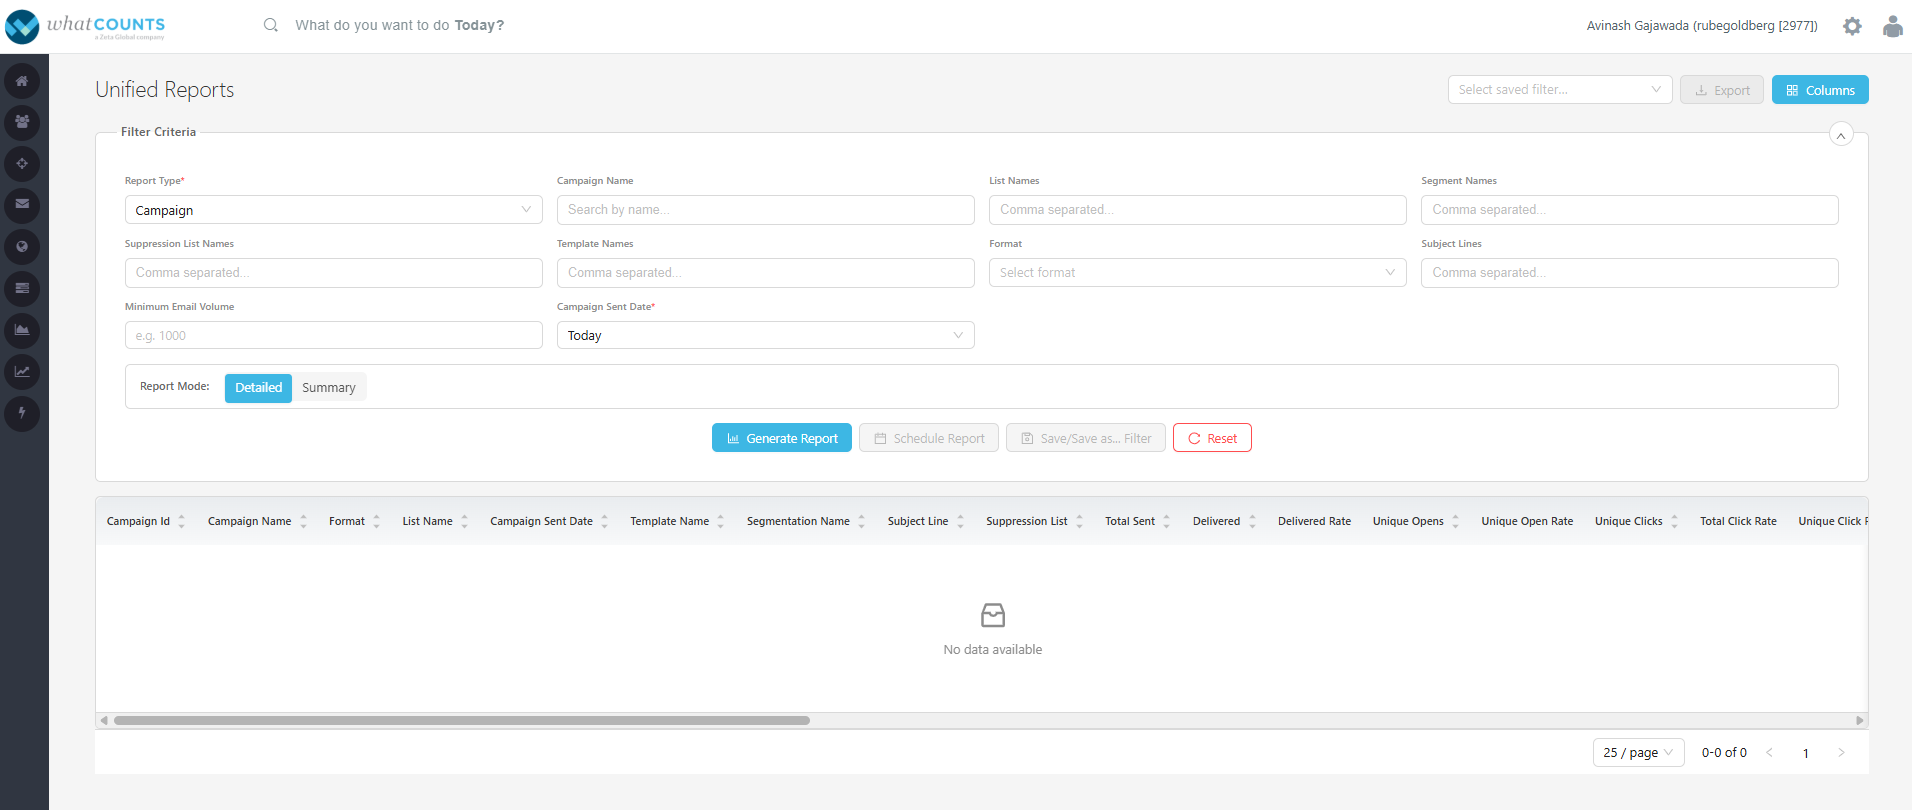
Click on the “Report”, which redirects you to the following page.
-
Filter Criteria
-
Report Type, with values
-
Campaign,
-
API,
-
Automations.
Default selection is Campaign; you can select others from the dropdown.
-
-
Campaign Name, allows you to enter one or more campaign names, using a comma separator.
-
List Names, allows you to enter one or more list names, using a comma separator
-
Segment Name, allows you to enter one or more segment names, using a comma separator.
-
Suppression Lists, allows you to enter one or more suppression list names, using a comma separator.
-
Template Names, allows you to enter one or more template names, using a comma separator.
-
Format, a dropdown list to select either HTML, Plain Text or Multipart.
-
Subject lines, allows you to enter one or more subject lines, using a comma separator.
-
Minimum volume, allows you to enter a numeric value.
-
Campaign Sent Date, a dropdown list with
-
Today
-
Yesterday
-
Specific Date, ex: February 12th
-
Specific range, ex: March 1st to March 31st.
-
Relative - last 1 to 365 days, ex: last 60 days
-
-
For Report Type= Automations:
-
Automation Start date, a dropdown list with
-
Today
-
Yesterday
-
Specific Date, ex: April 12th
-
Specific range, ex: March 1st to March 31st.
-
Relative - last 1 to 365 days, ex: last 160 days.
-
-
-
Report Mode: This allows you to fetch a detailed report or a summarized report.
-
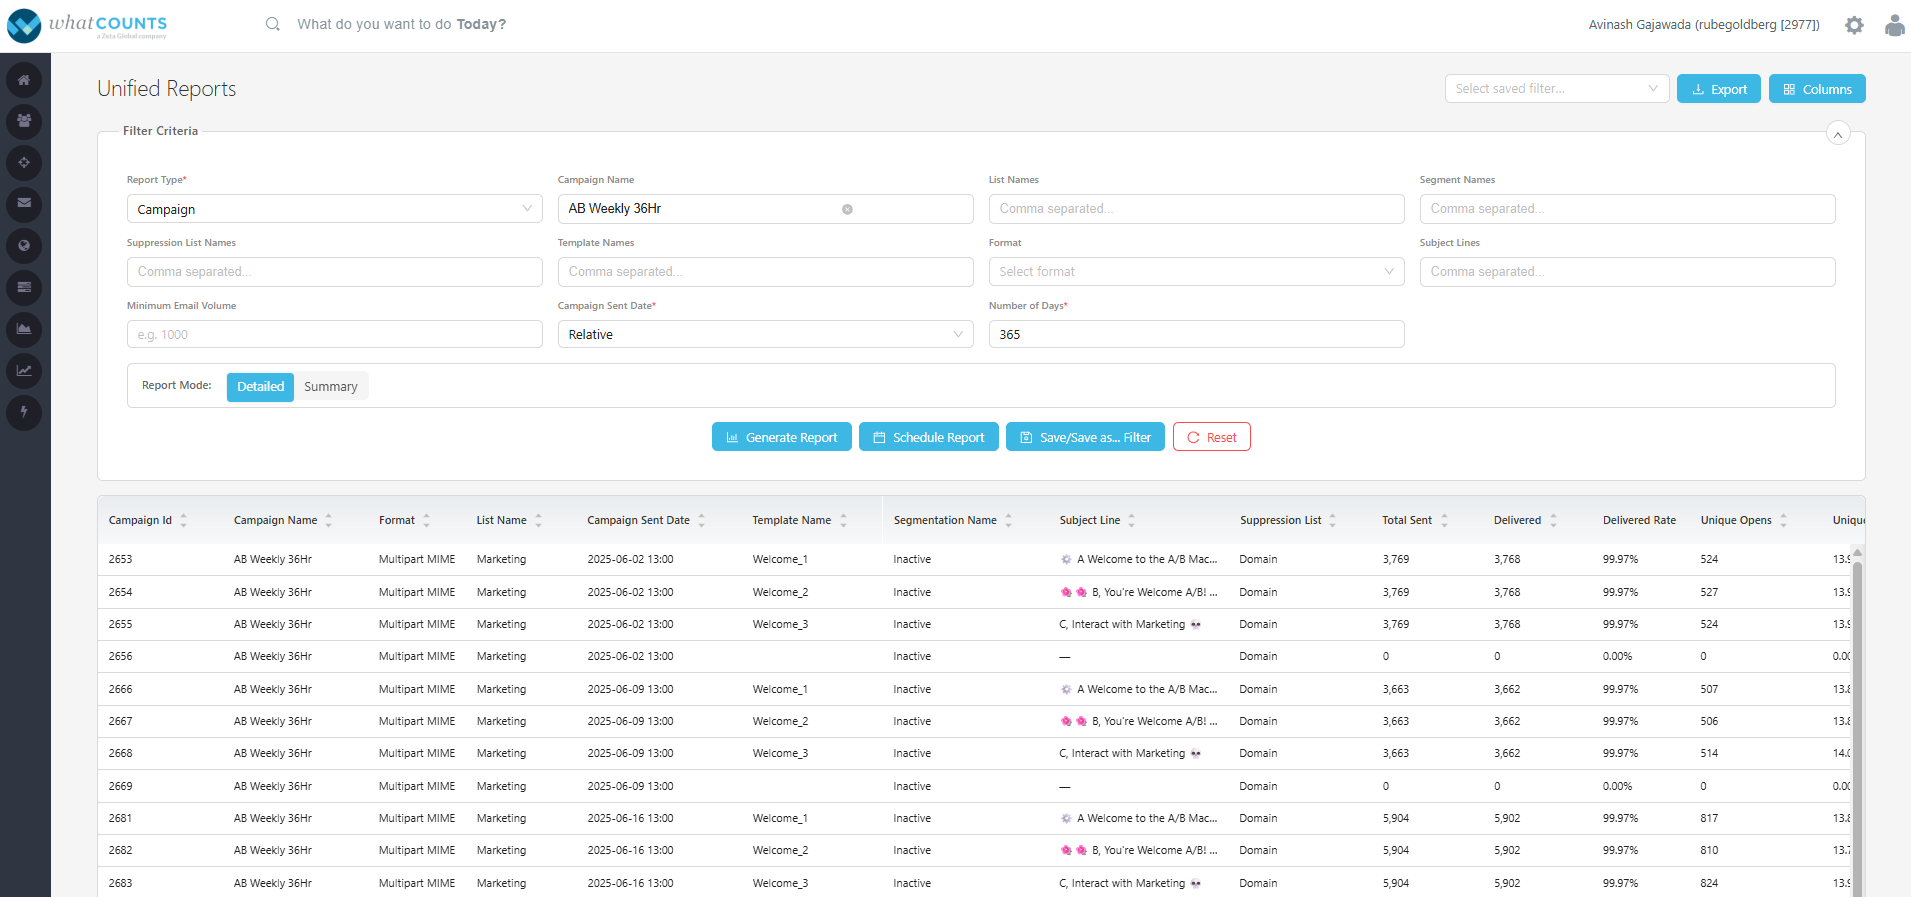
Detailed will be selected by default.
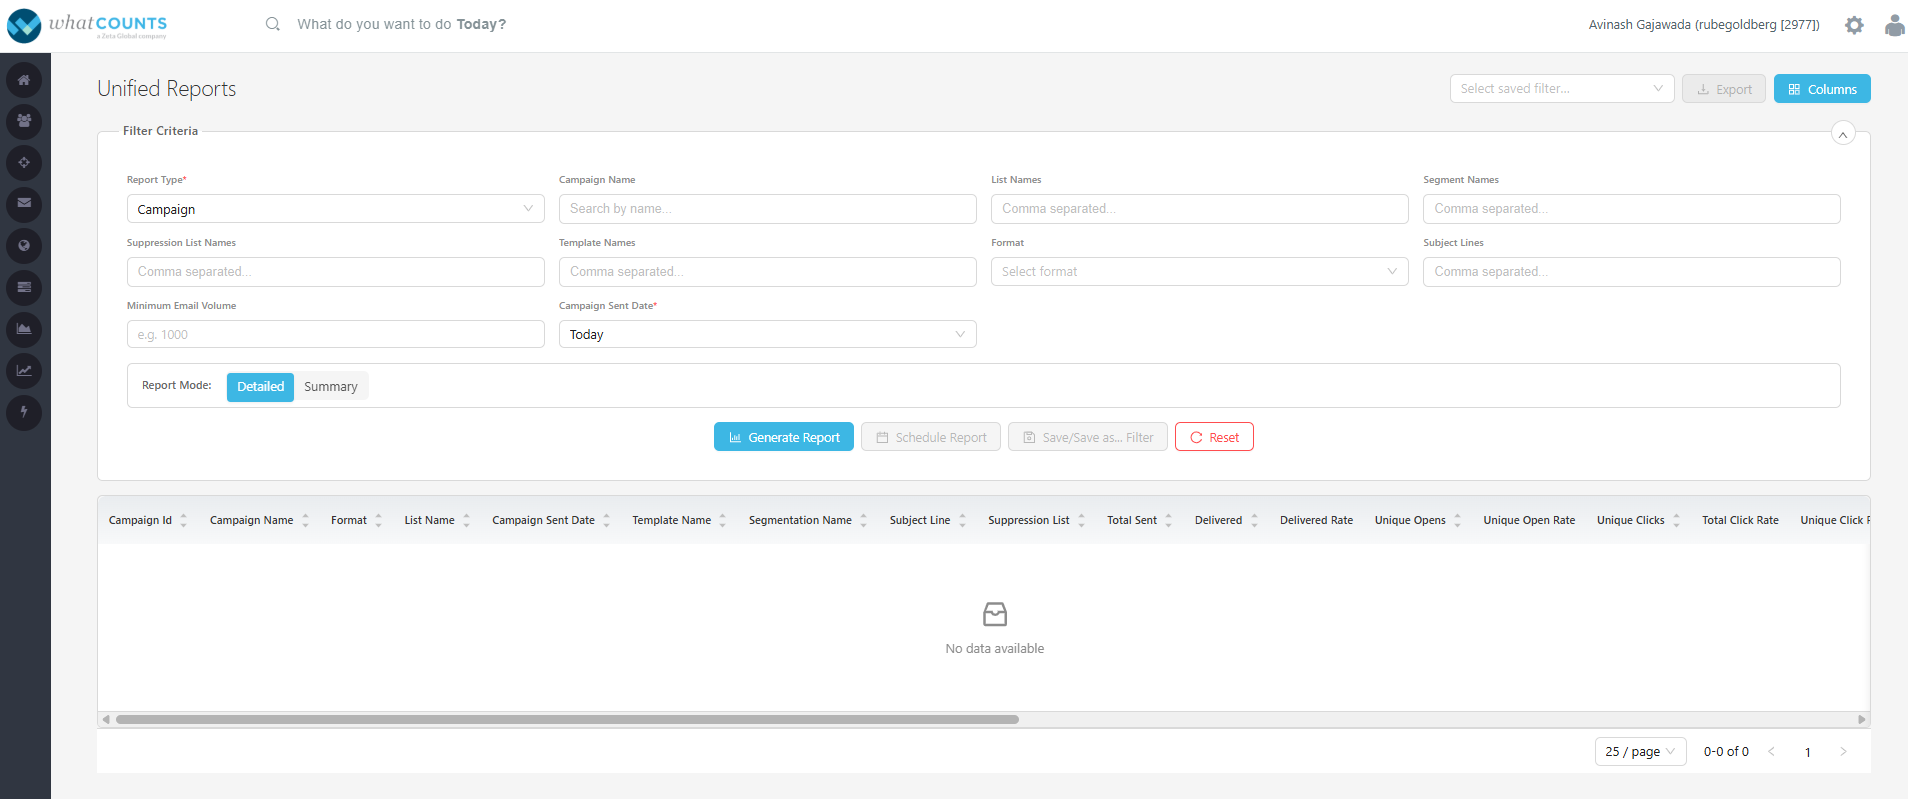
Unified Reports - Detailed mode -
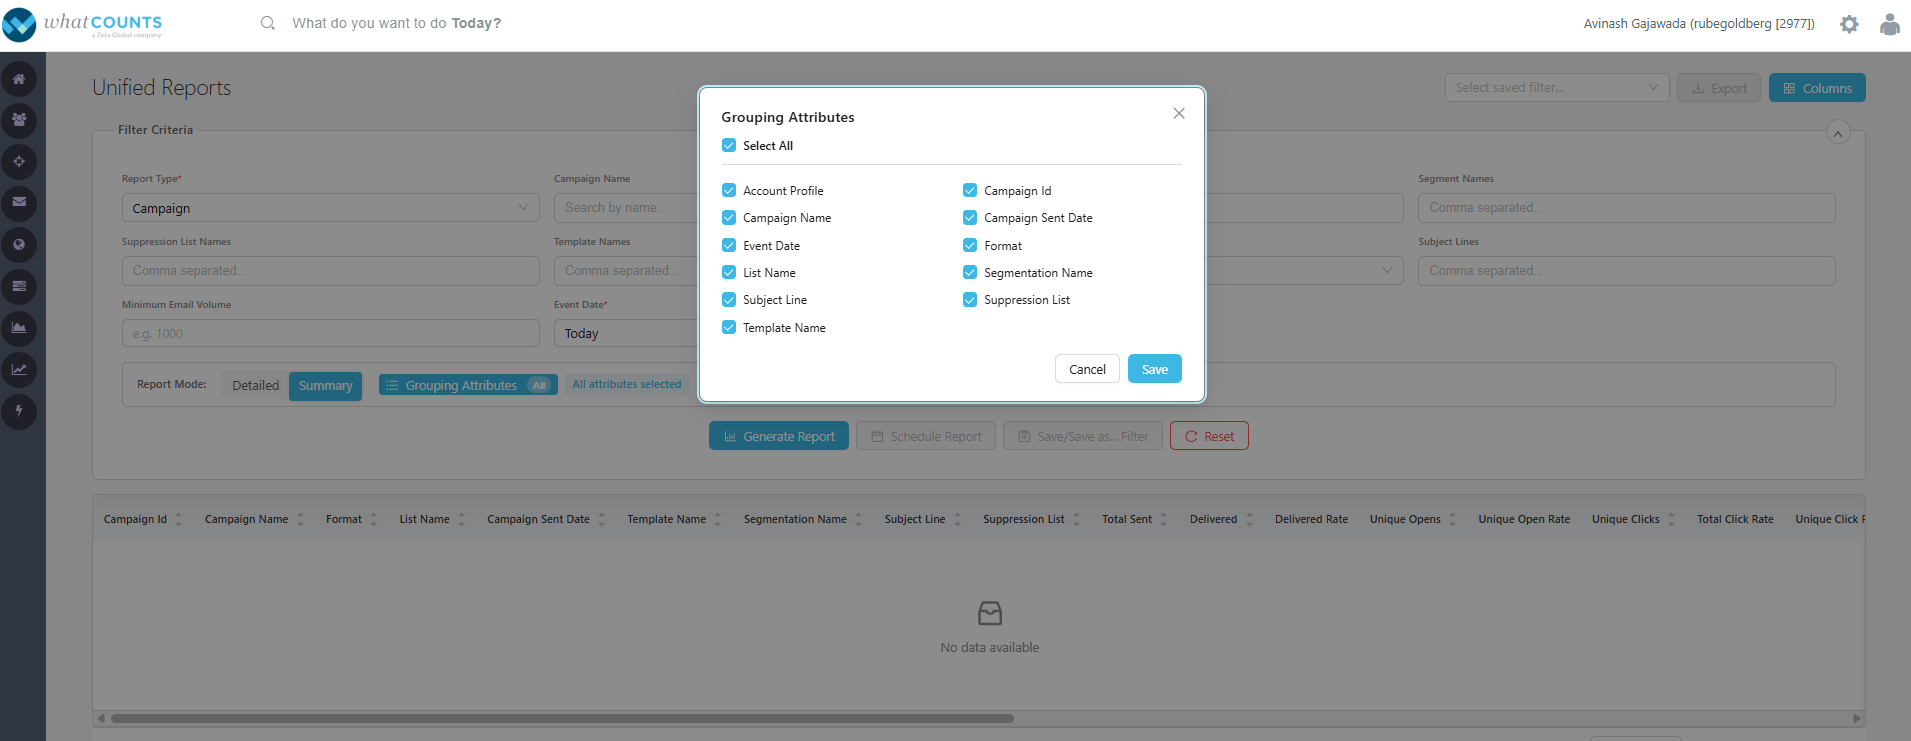
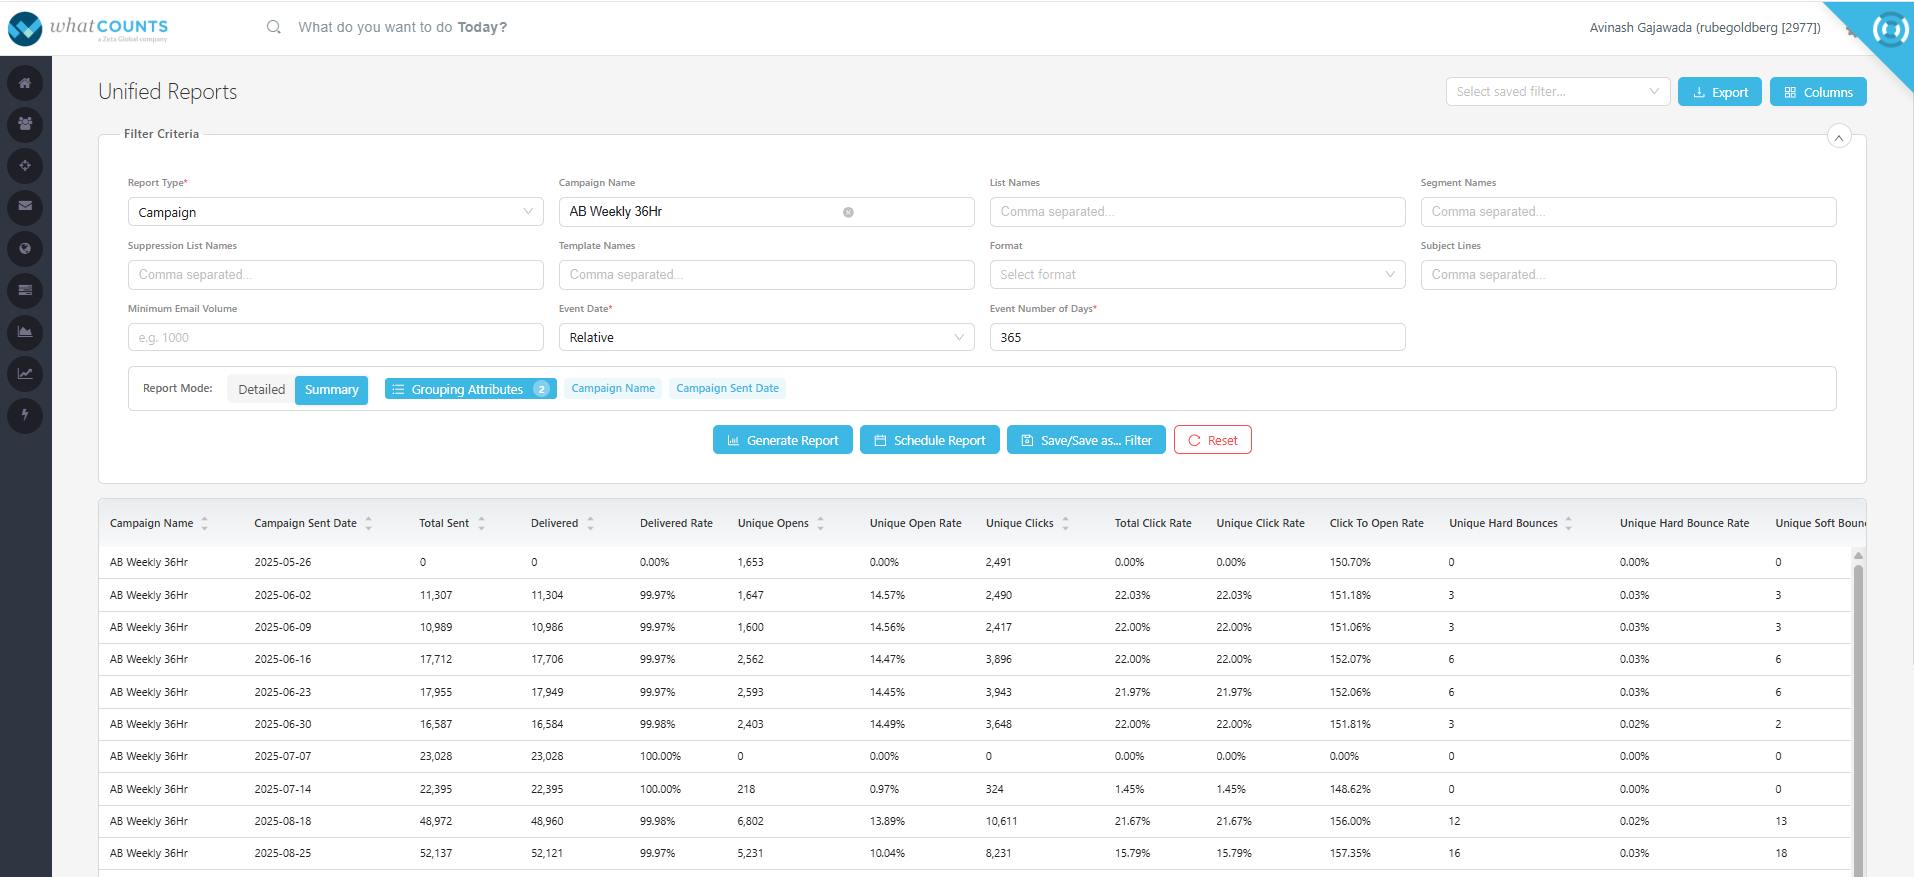
Summary Reports will allow fetching summarized reports at user choice of requirement. Once you select this, All grouping attributes are selected by default, click to view and make changes as per need.
Example: Summarized report by campaign, or event date.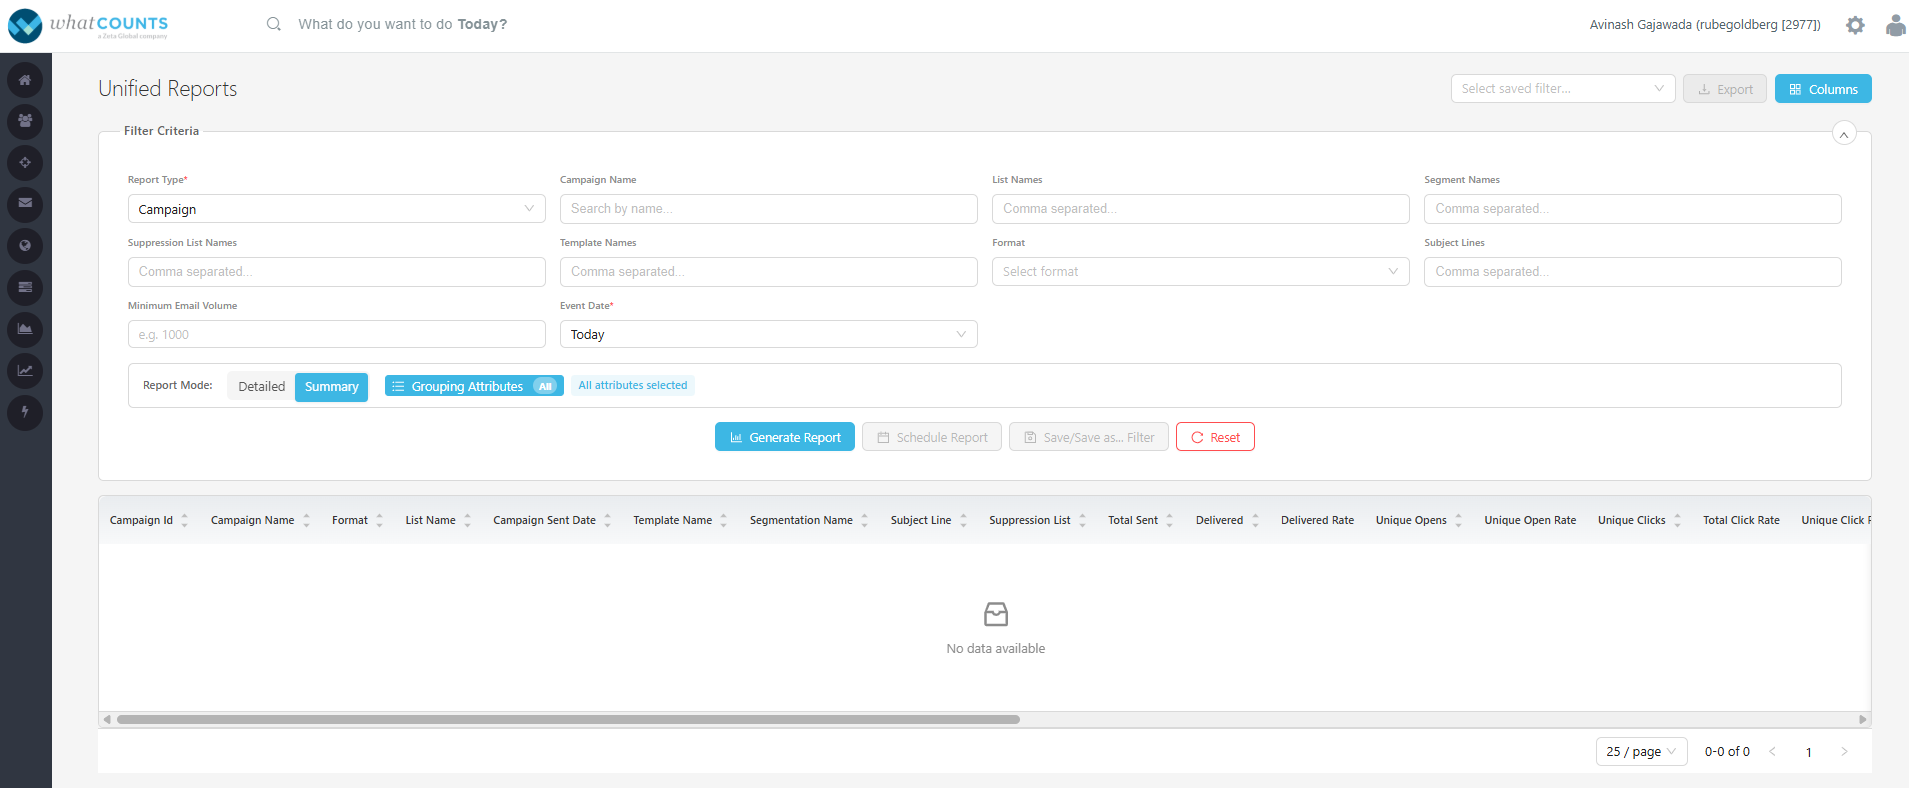
Unified Reports - Summary mode
-
-
Report Generation:
-
Click on “Generate Report” to view the reports of the selected criteria, as shown in the screenshot below.
-
-
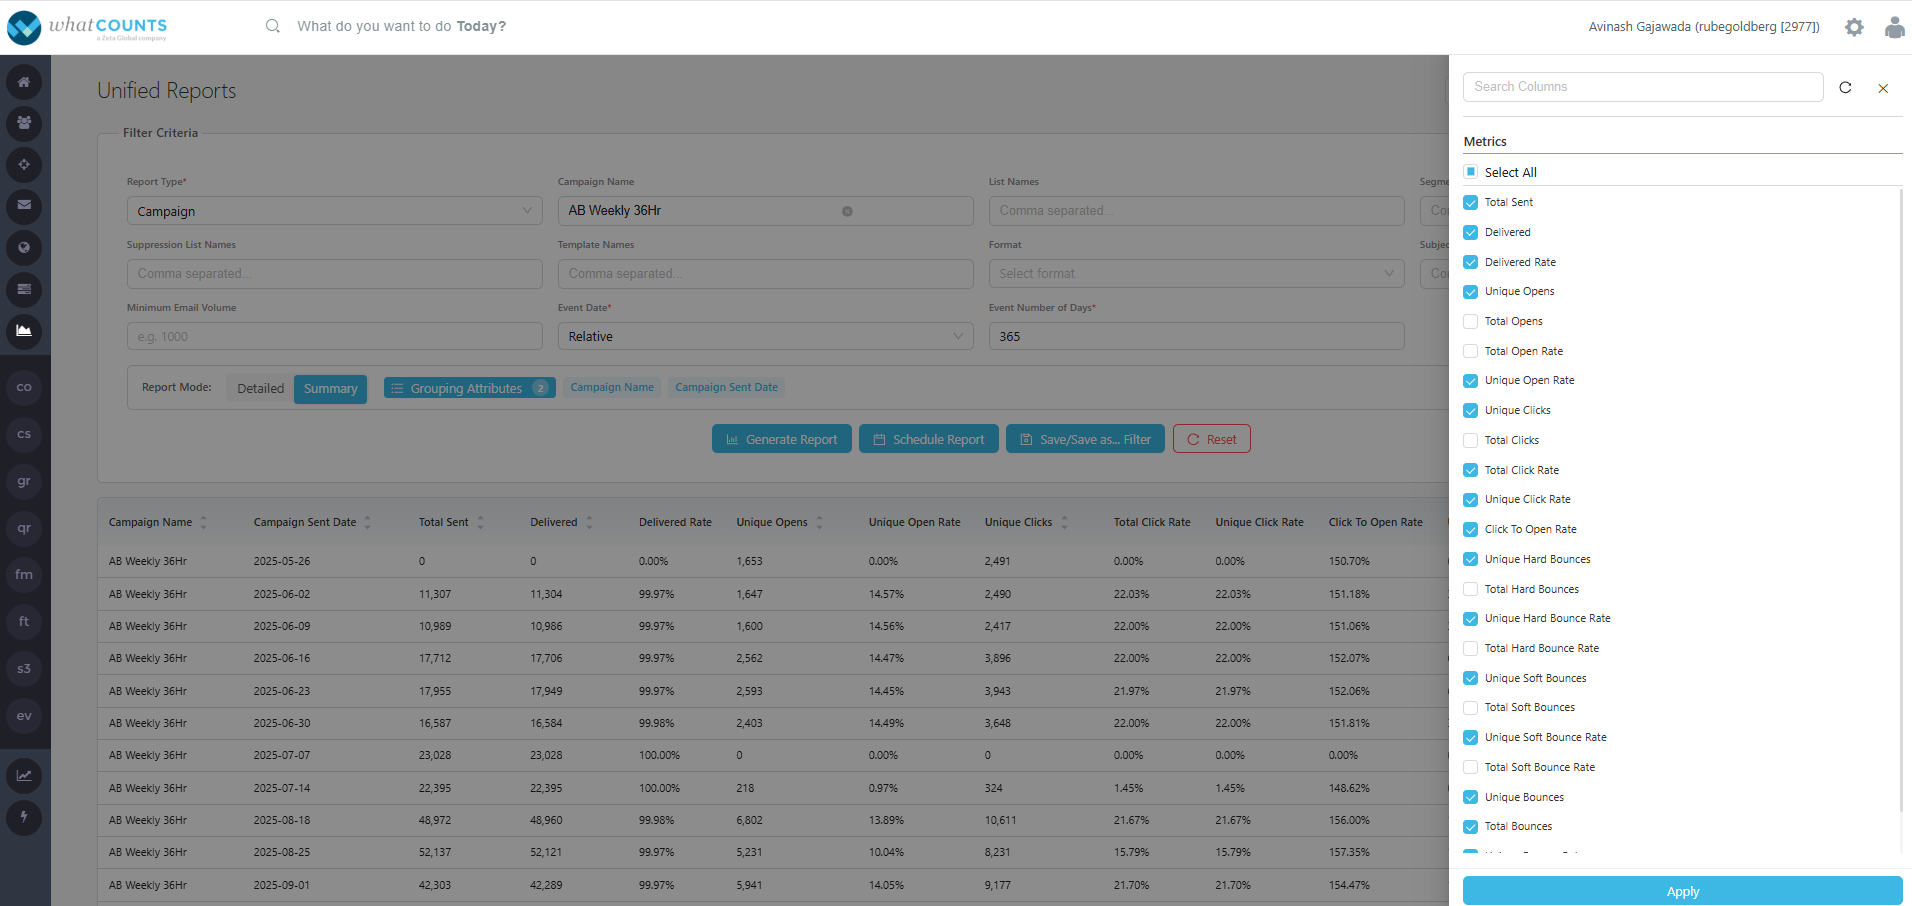
Columns: There are 2 different column headers, such as Dimensions and Metrics. That gives a quick selection at the right-top corner of this page. Click on it to view the default and optional columns for the report, as shown in the screenshot below:
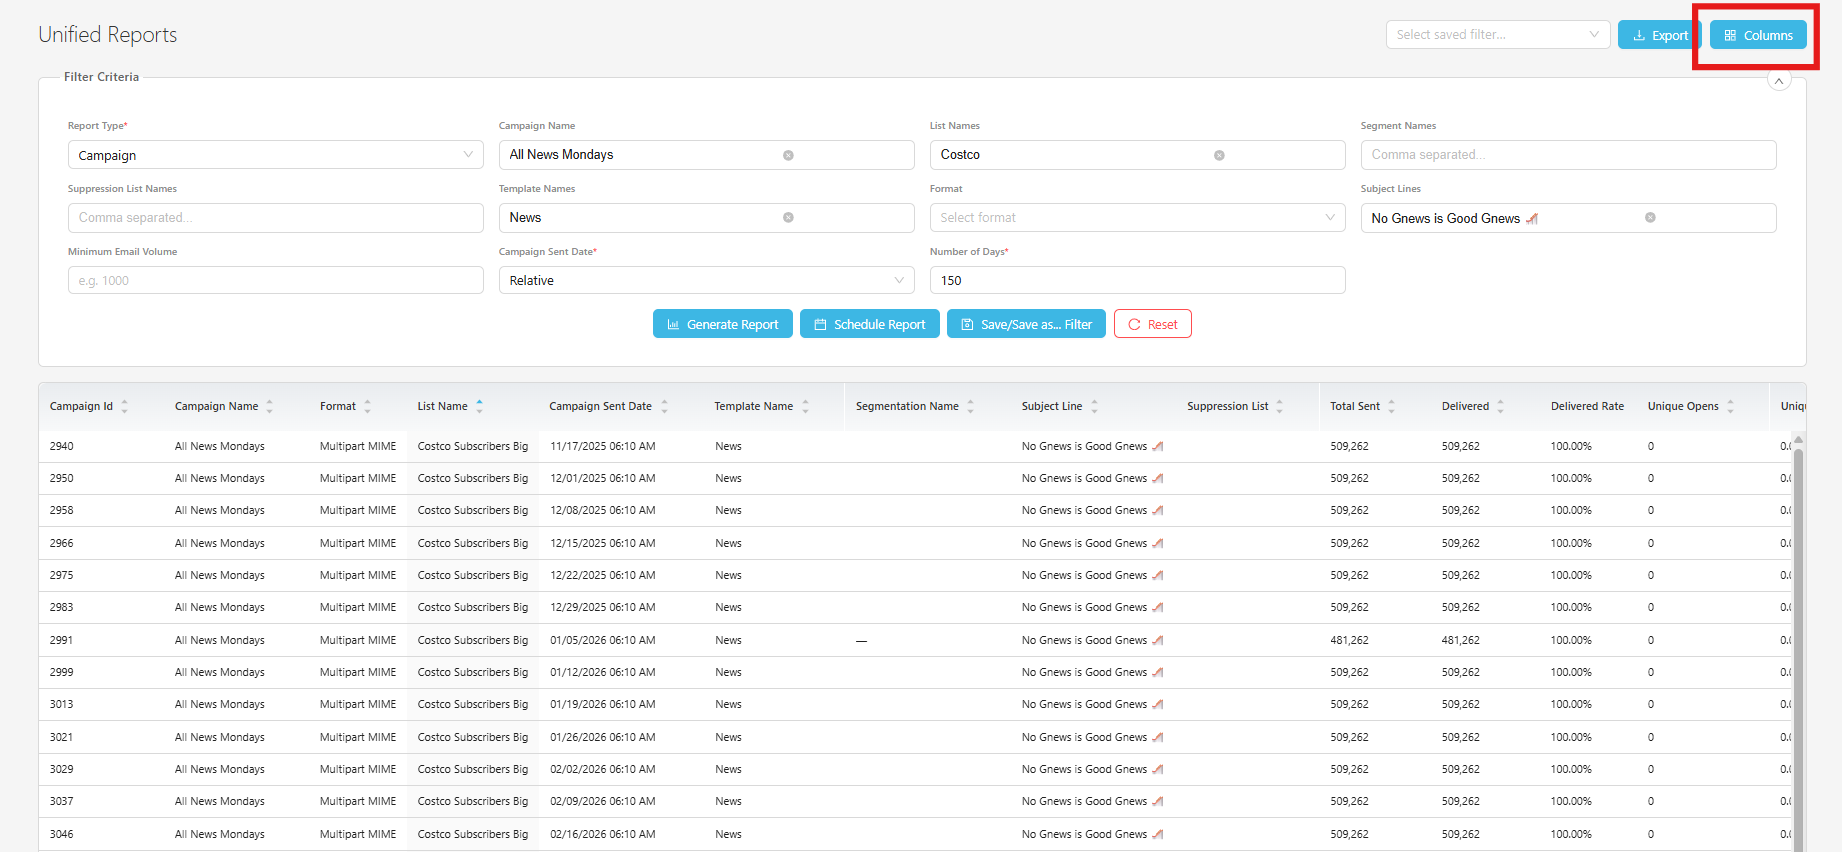
Columns
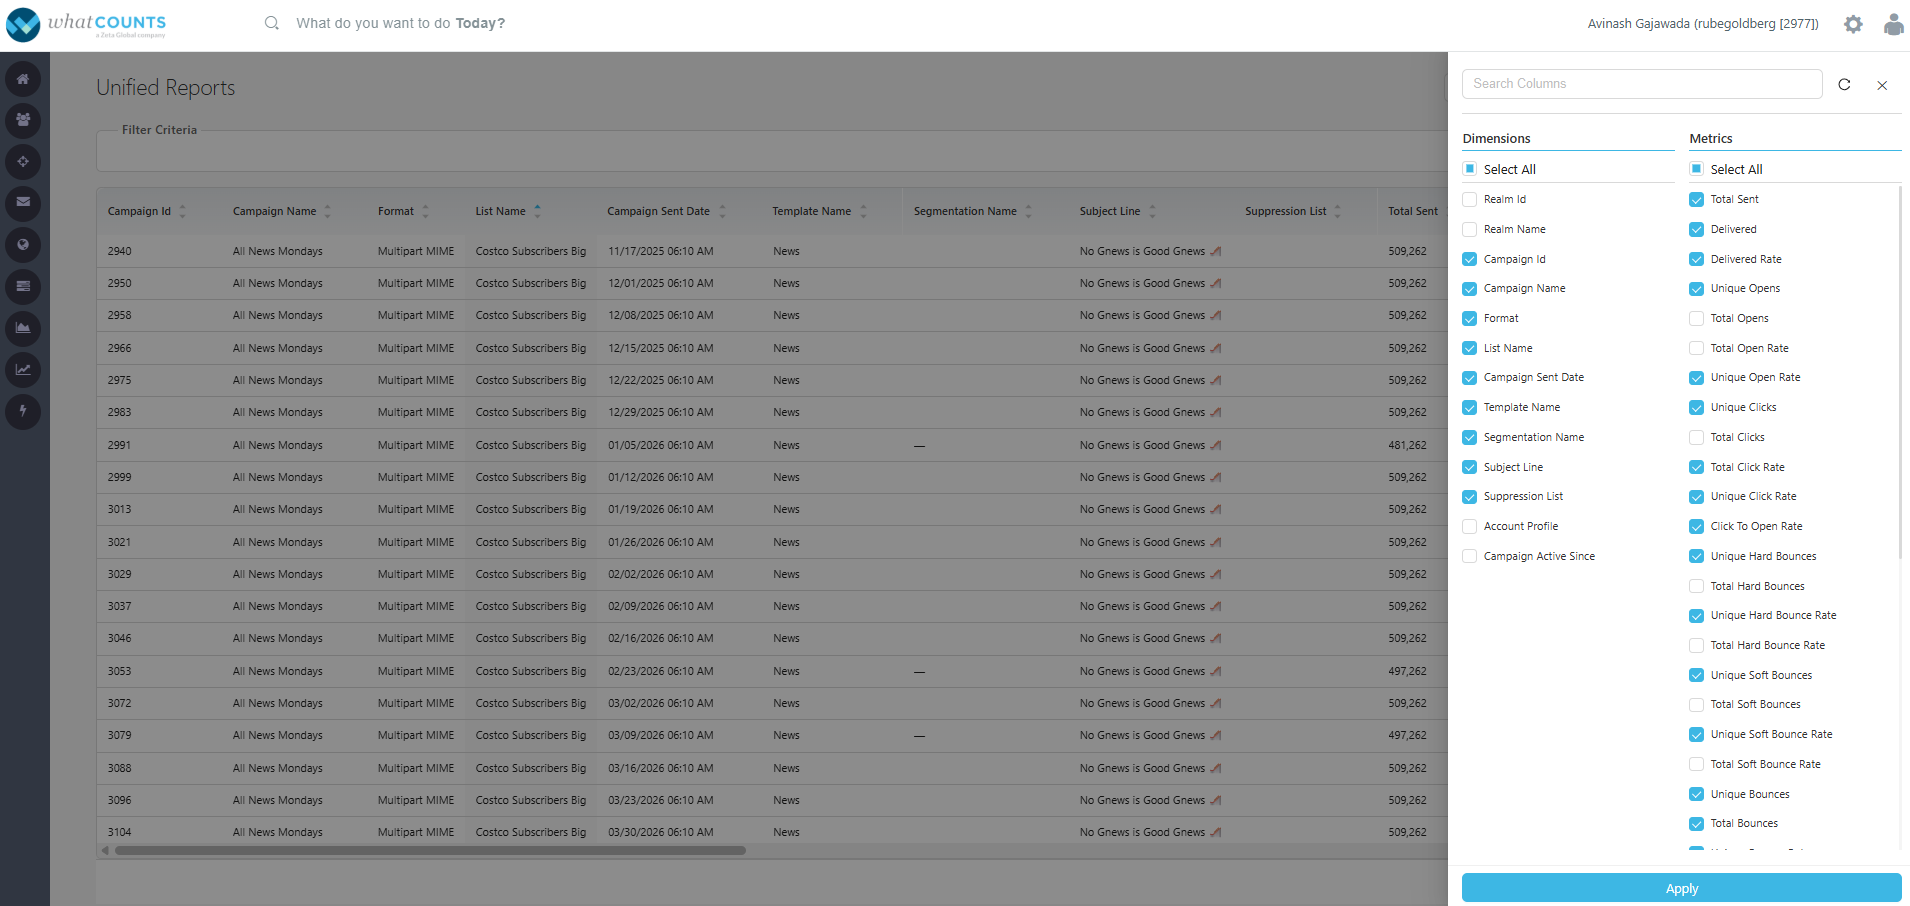
Detailed Report - Column selection & Apply.
-
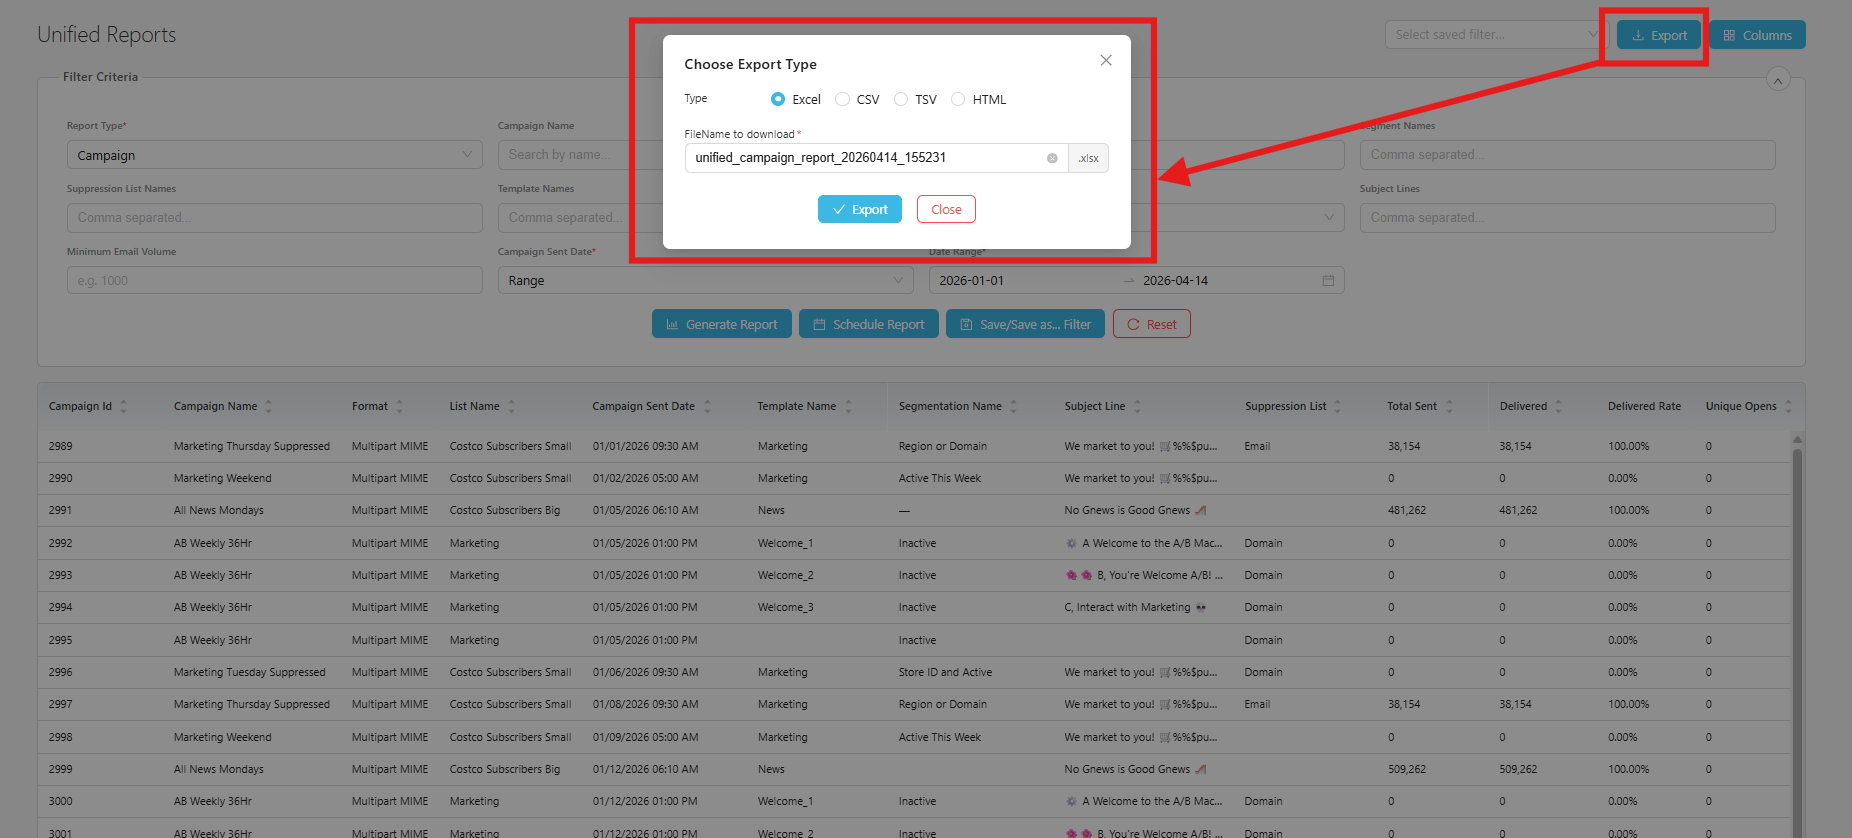
Export: You can export to your local using the export button.
-
Choose Export File Type:
-
Excel
-
CVS, with comma, pipe or tab separators.
-
TSV, with comma, pipe or tab separators.
-
HTML
-
-
File Name: System generates a predefined name, which can be edited as per your need.
-
-
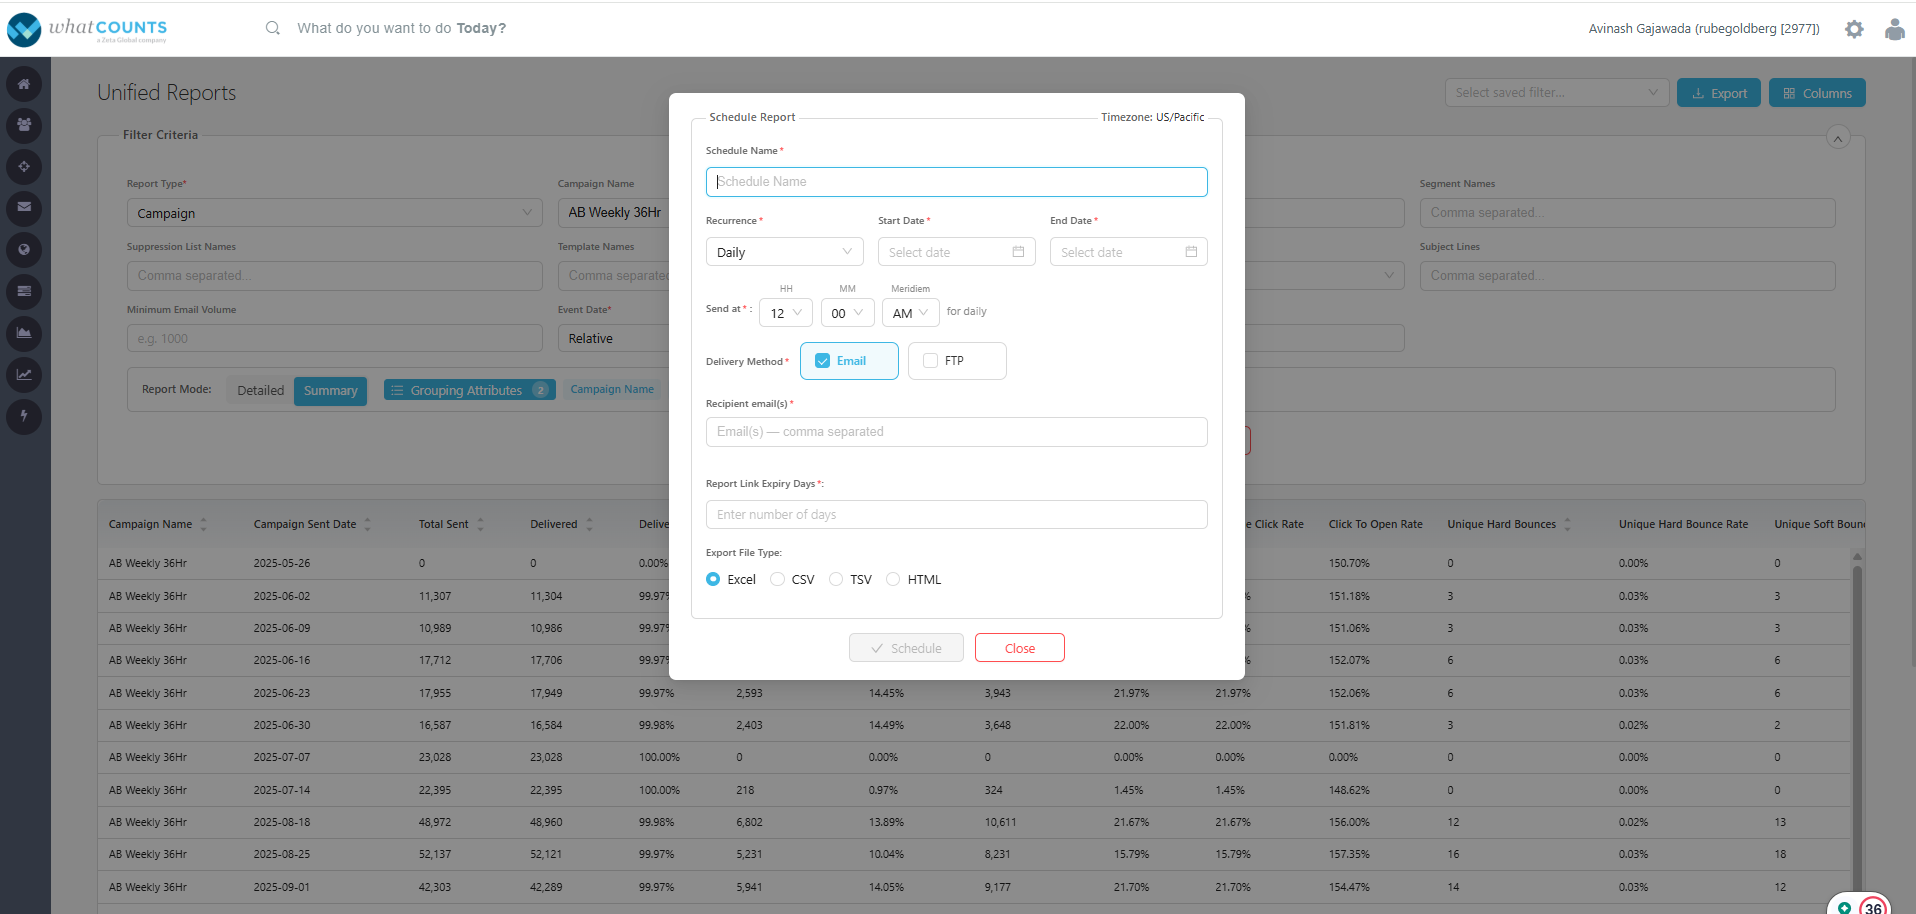
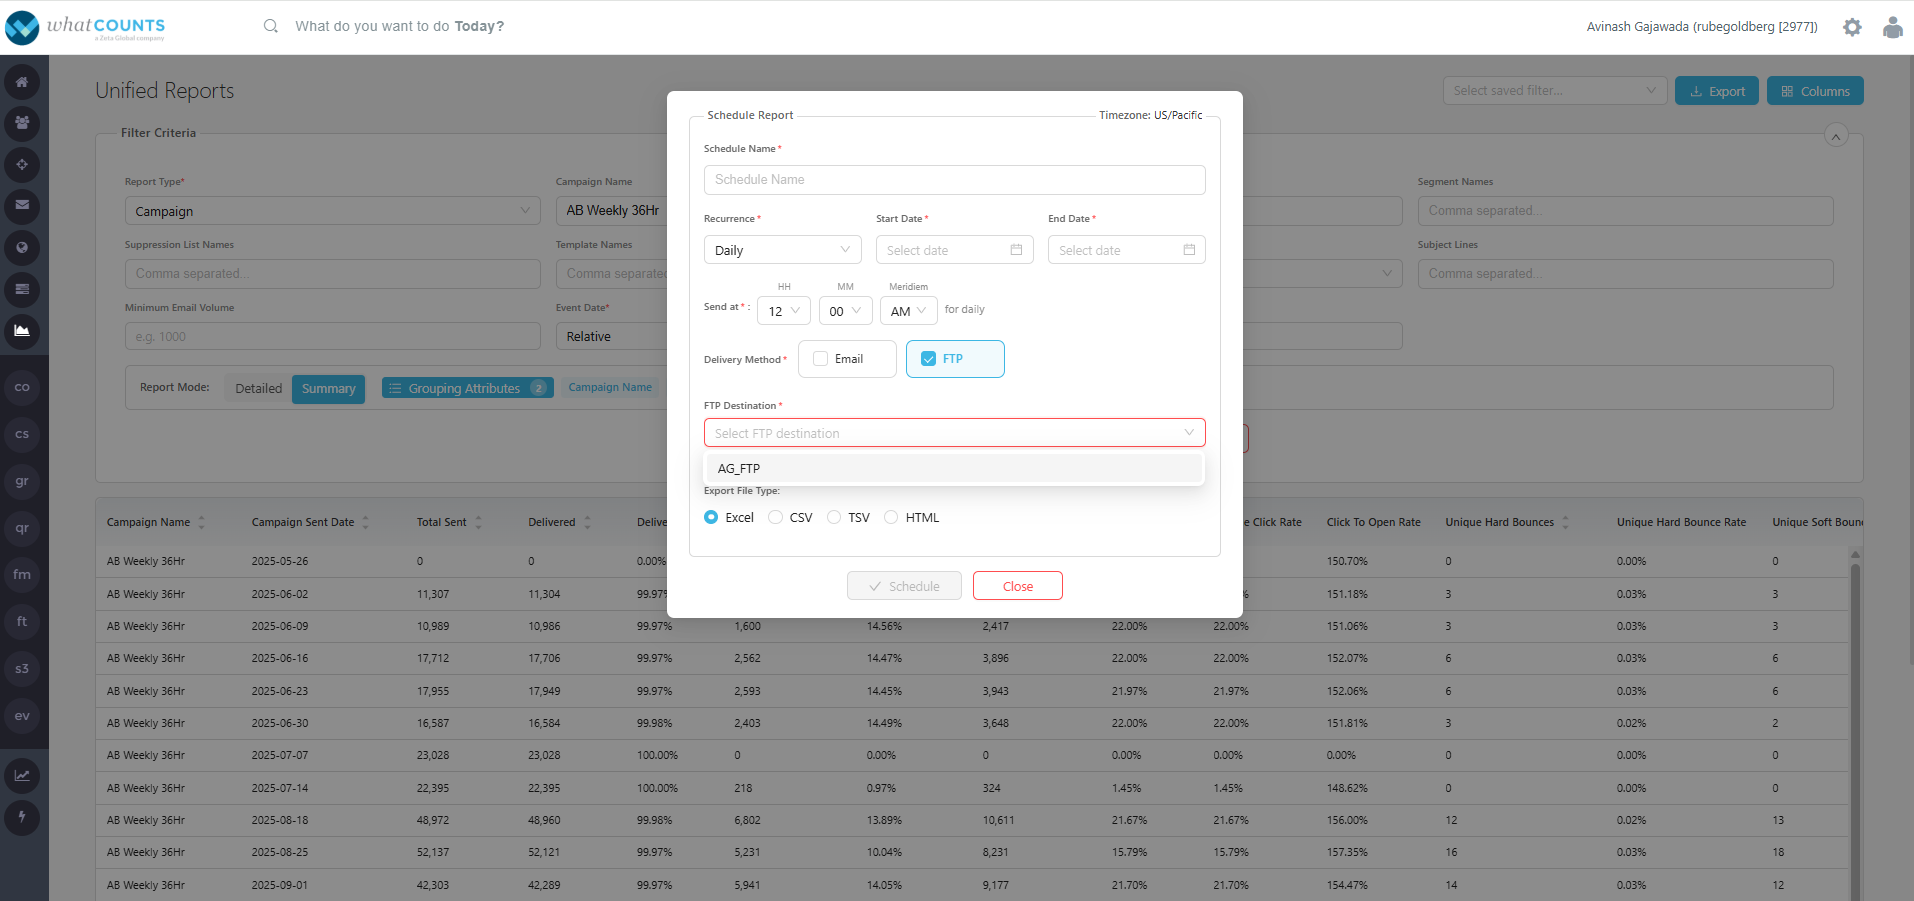
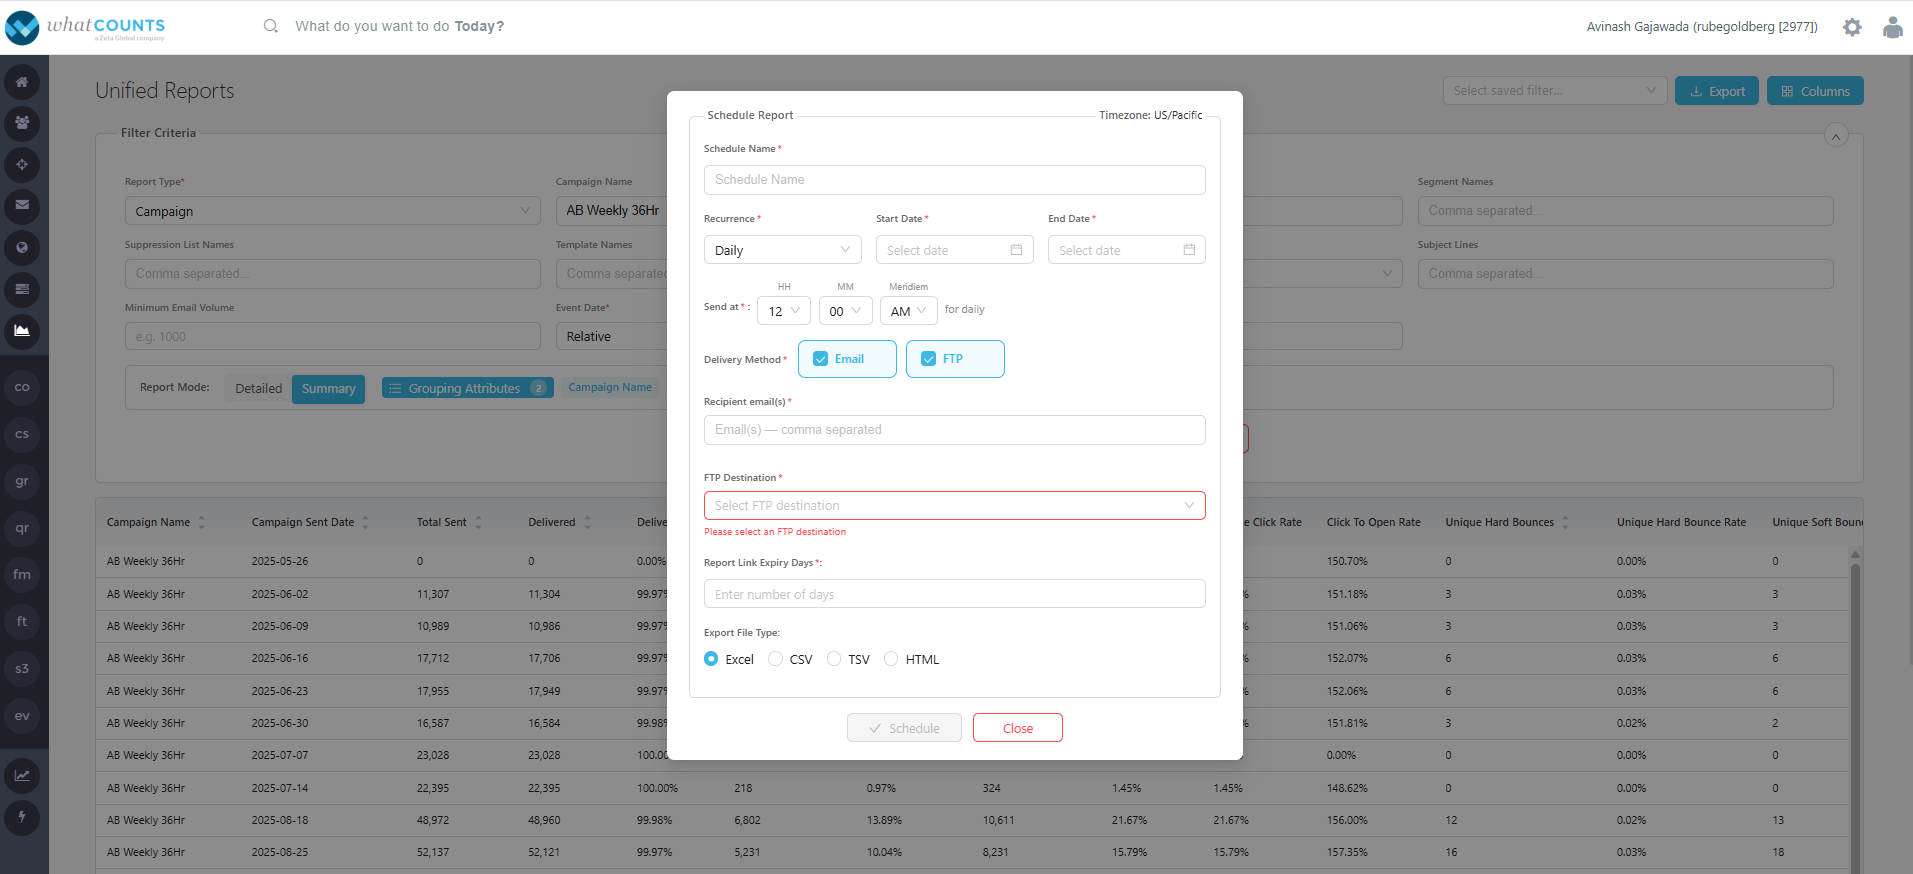
Schedule Reports: You can schedule a report to your email address or to an FTP folder by setting:
-
Schedule Name
-
Recurrence with following options, with a selection of start date and end date.
-
Daily
-
Once
-
Hourly
-
Weekly
-
Monthly
-
-
Send at: Select the preferred time.
-
Delivery Method: You can choose “Email”, or “FTP” or both.
-
Recipient email(s): Enter one or more email addresses to which this report should be sent. This is mandatory when Email is selected.
-
Report Link Expiry Days: Enter a numeric values for how many days the report link should work. This is mandatory when Email is selected.
-
FTP Destination: Select an FTP from the picklist, that includes all FTPs added in the FTP Manager page.
-
Export File Type:
-
Excel
-
CSV, with comma, pipe or tab separators.
-
TSV, with comma, pipe or tab separators.
-
HTML
-
-
-
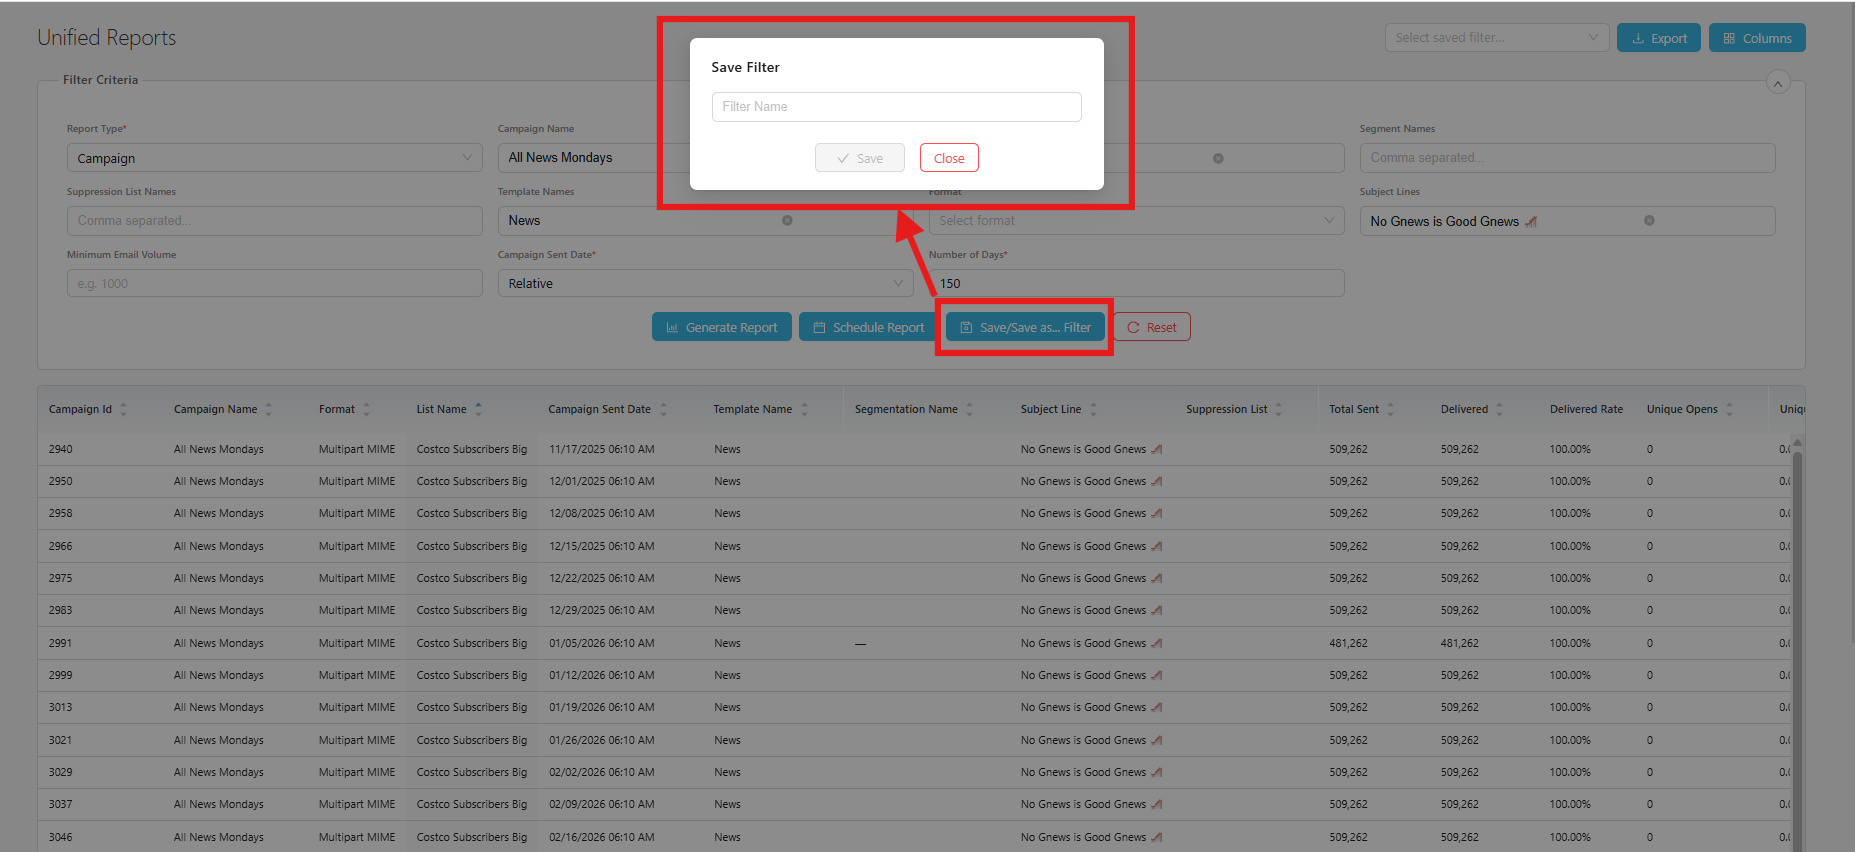
Save/Save as filter: This allows you to save a filter criteria, and use it as and when required.
-
Filter Name: enter a name for the filter.
-
-
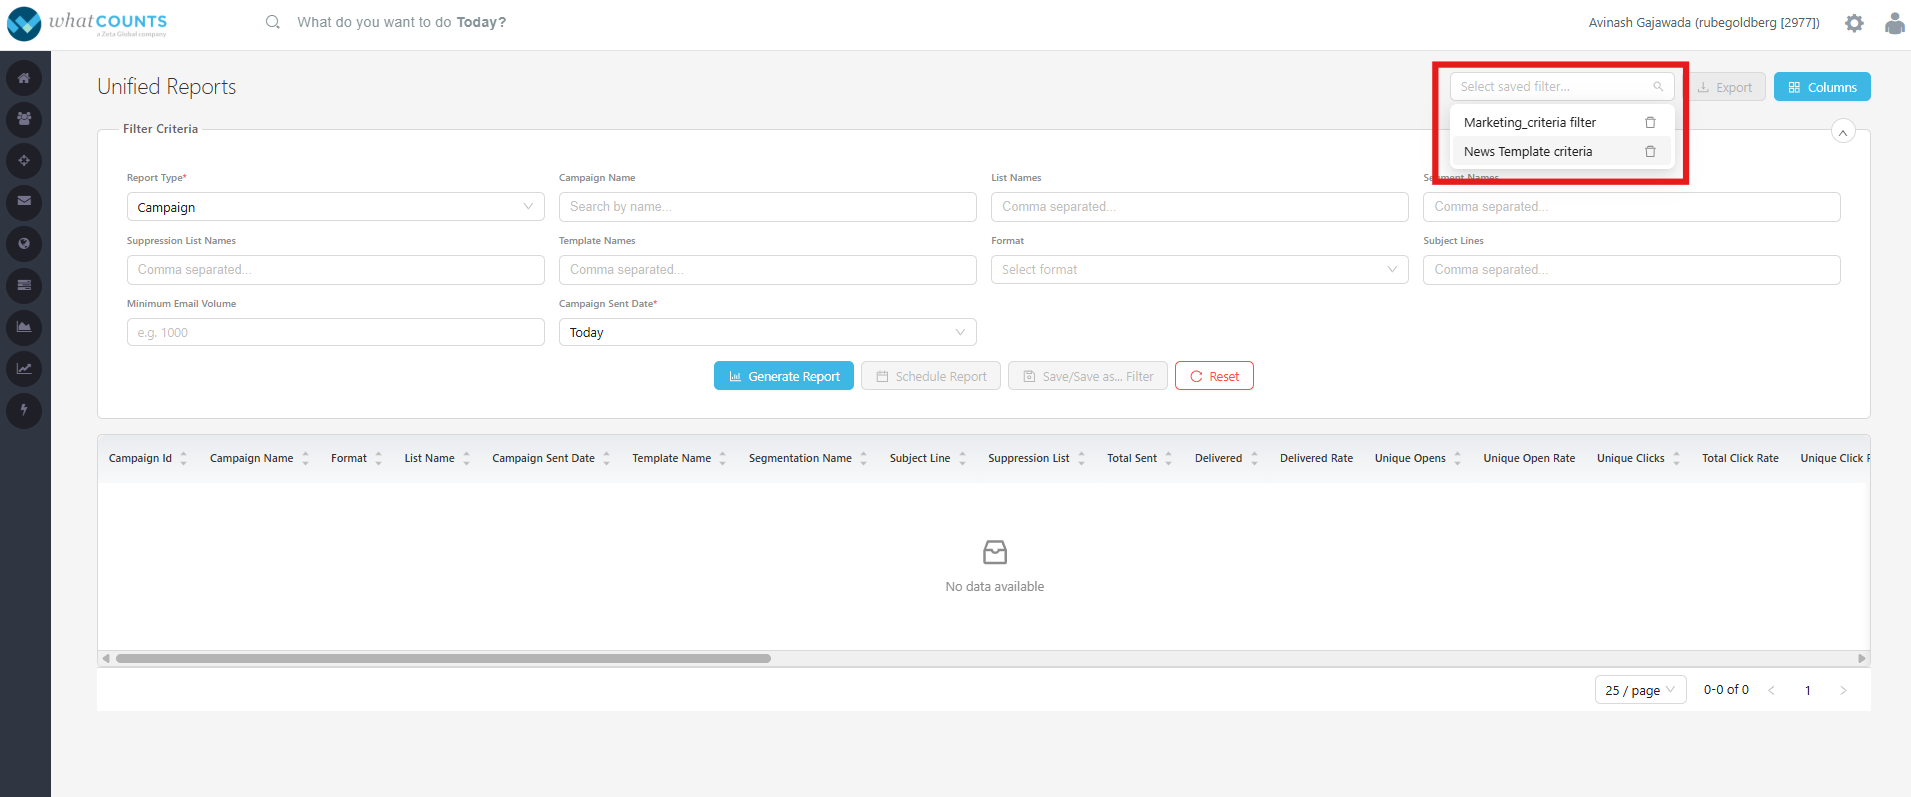
Use saved filters:
-
You can view the list of saved filters, select from it.
-
You can also delete any of the saved filters, clicking delete icon right after the filter name.
-
-
Reset: Click to reset the selected filter criteria.